Introduction :
In part 1, we saw what is a queue-based load leveling pattern, useful scenarios in which the pattern is implemented, and different approaches to implementing the pattern in Azure.
In this blog post, I will implement the pattern using one of the approaches.
Prerequisites :
Please go through https://exploreazurecloud.com/2021/07/implement-queue-based-load-leveling-pattern-in-azure-part-1 before you read this blog post.
If you want to try implementing this pattern practically, You need to have an Azure subscription, create an Azure Free Account using this link https://azure.microsoft.com/en-in/free/?ref=microsoft.com&utm_source=microsoft.com&utm_medium=docs&utm_campaign=visualstudio
Practical Implementation of the Pattern using Azure Logic Apps and Azure Service Bus :
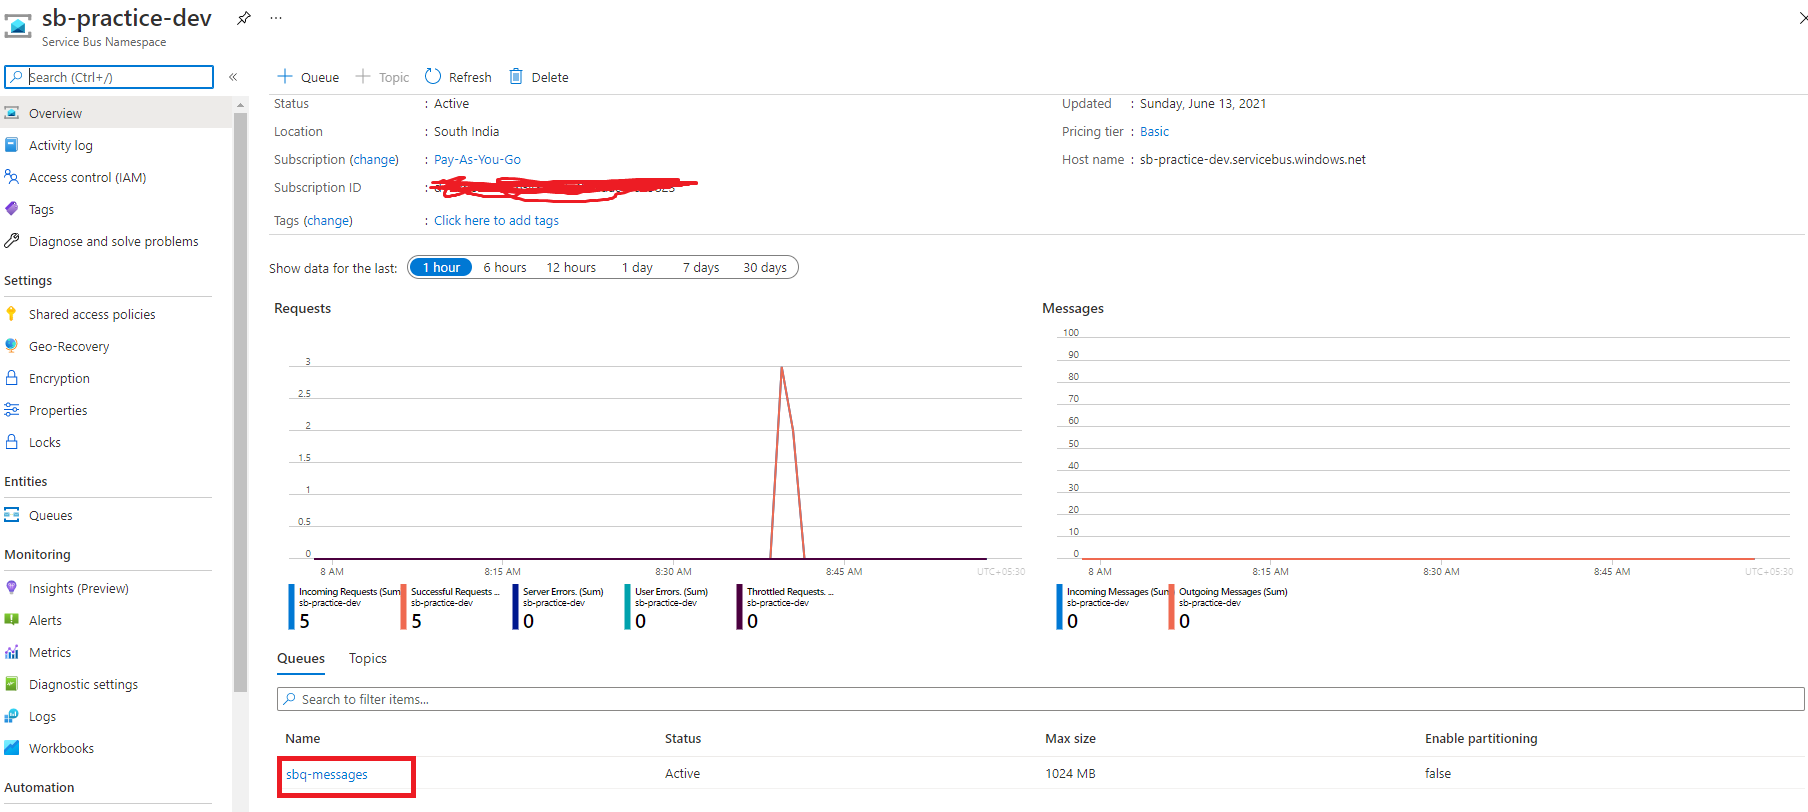
Sign in to the Azure Account and Create an Azure Service Bus Queue which we will use later in the demo . Use this link to create the same . https://docs.microsoft.com/en-us/azure/service-bus-messaging/service-bus-quickstart-portal
Once Created , you will have a service bus created with queue like below .
3. Before we see how messaging queue layer is introduced between the Source and the Target API, We will see the logic app instances hitting the target API directly.
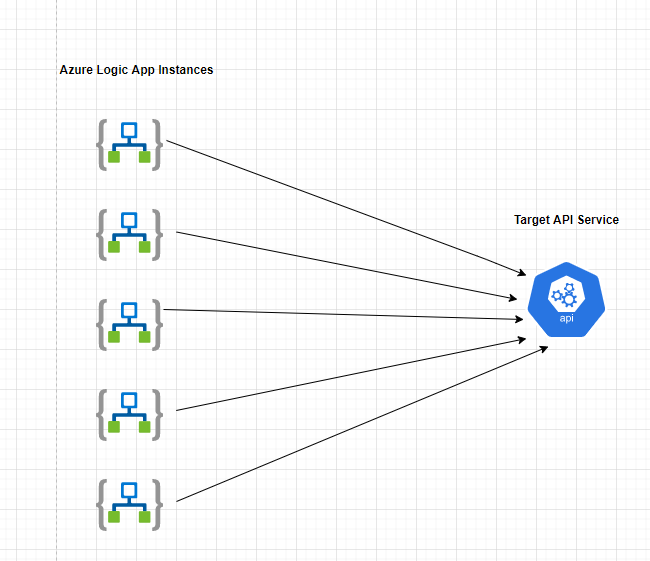
4. In order to demonstrate this, I created two logic apps i.e one logic app invoking the target API and one more logic app to invoke this main logic app in for each loop so that multiple instances of the logic app hits the target API in parallel.
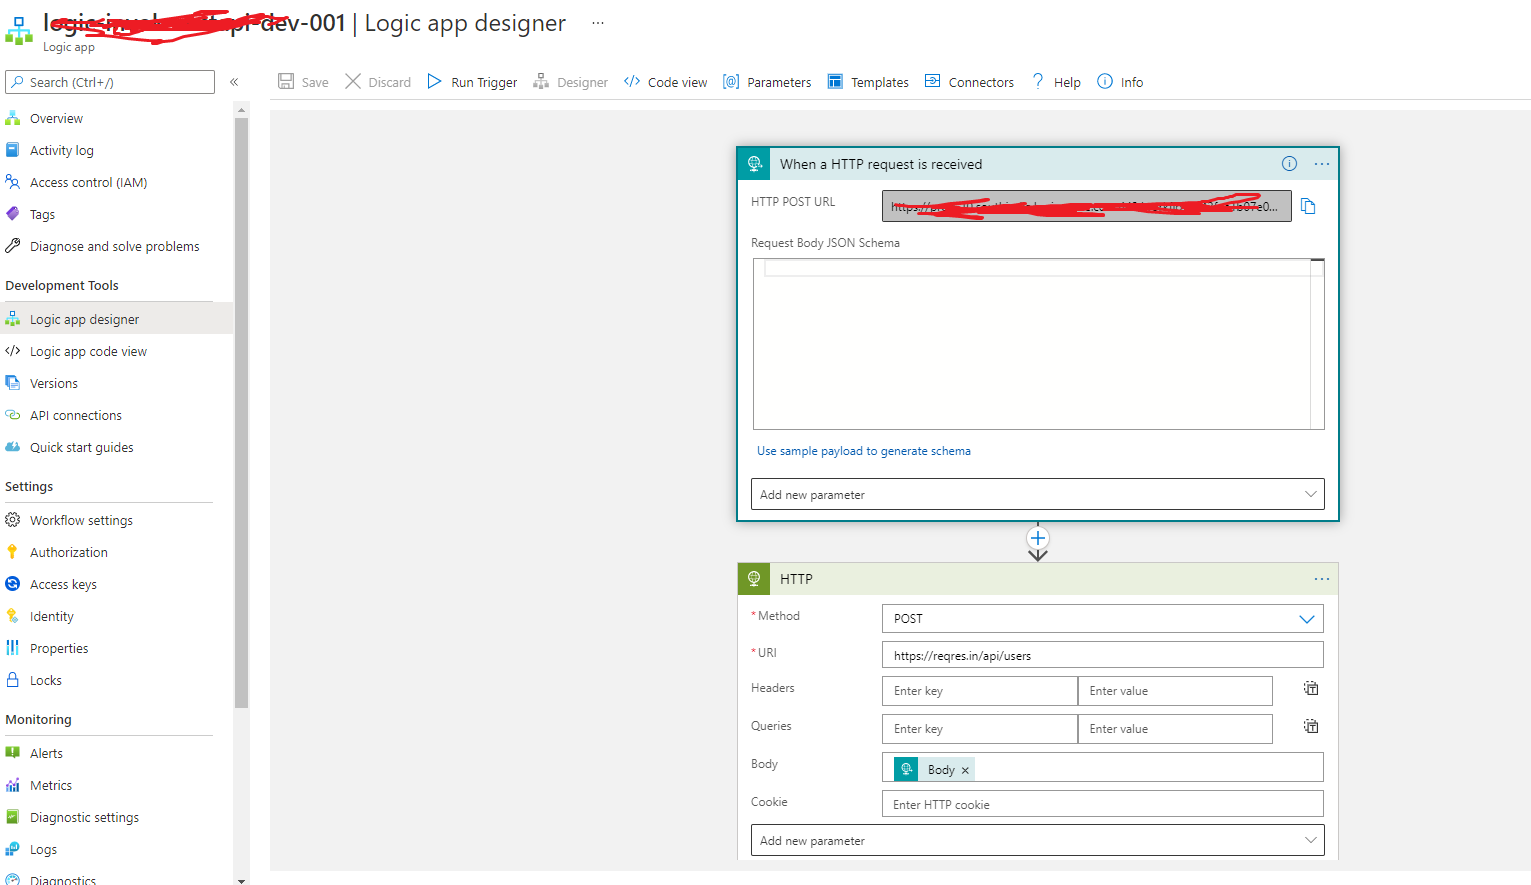
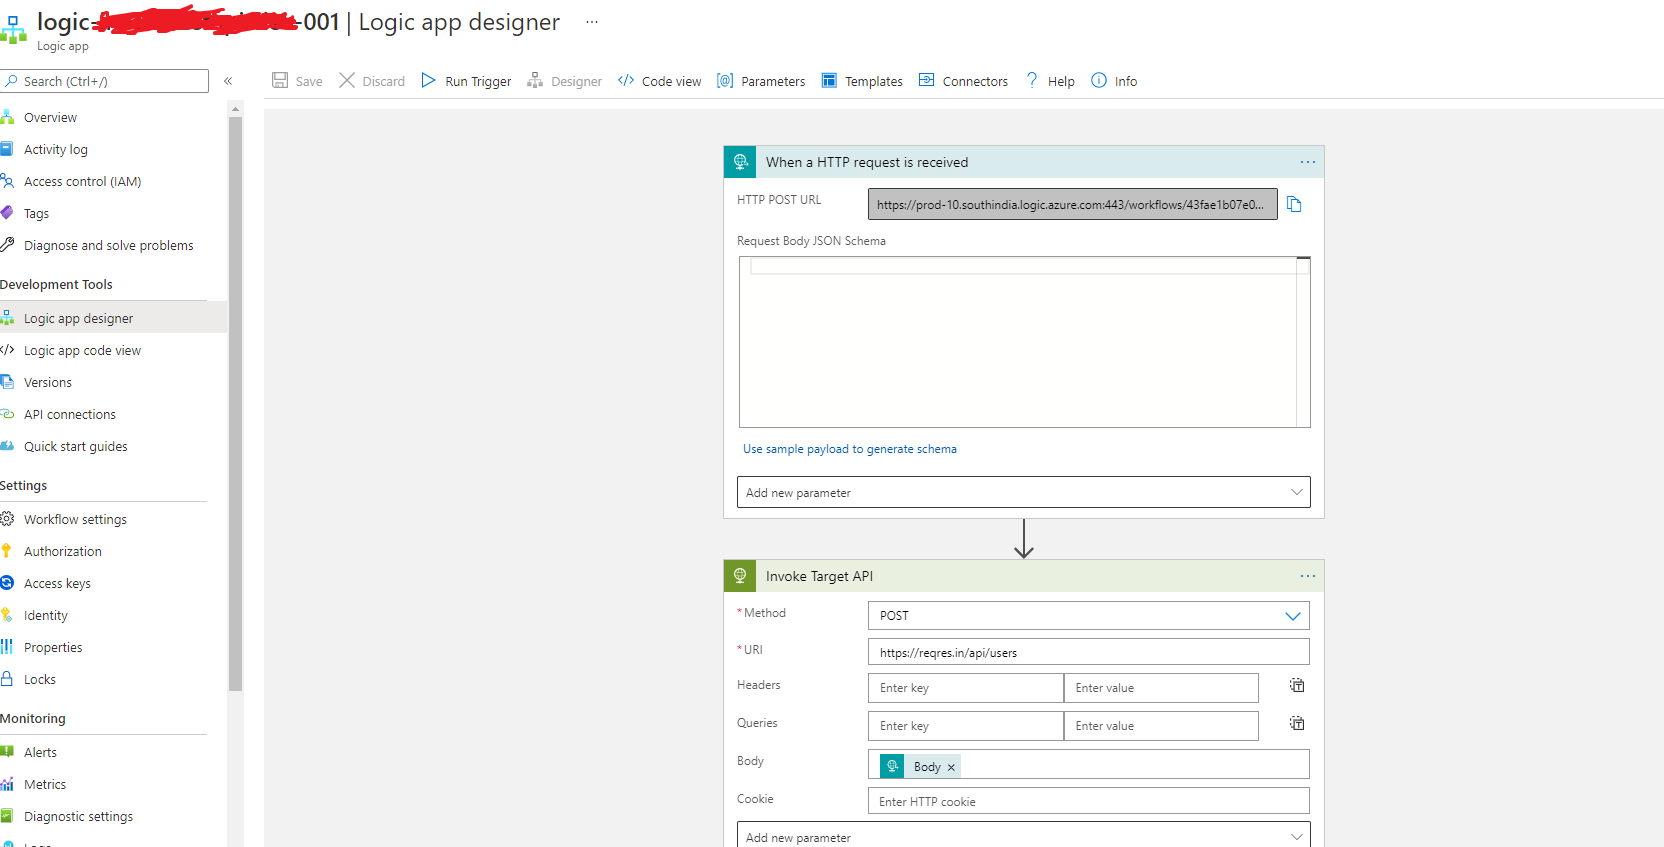
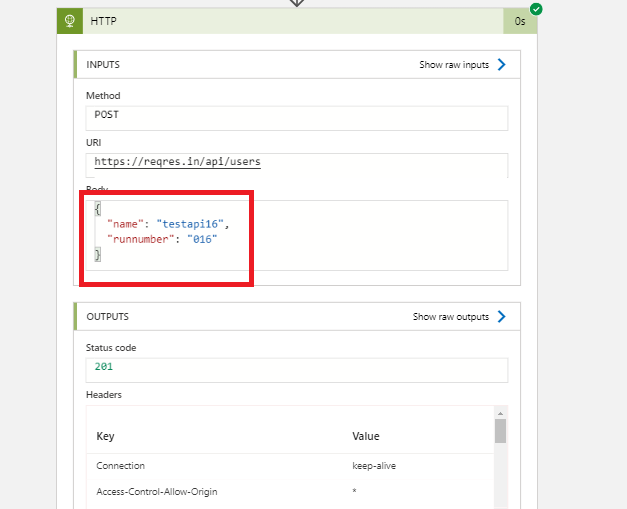
5. Please find the screenshot below of the logic app invoking the target API. Used an open-source API as the target API for the demo. Will be sharing the link of the API later in reference.
6. Now the logic app created in step 5 is called in another logic app inside a for each loop. Input for this logic app is a JSON Array containing child JSON elements which will be passed as input to each call made to the main logic app.
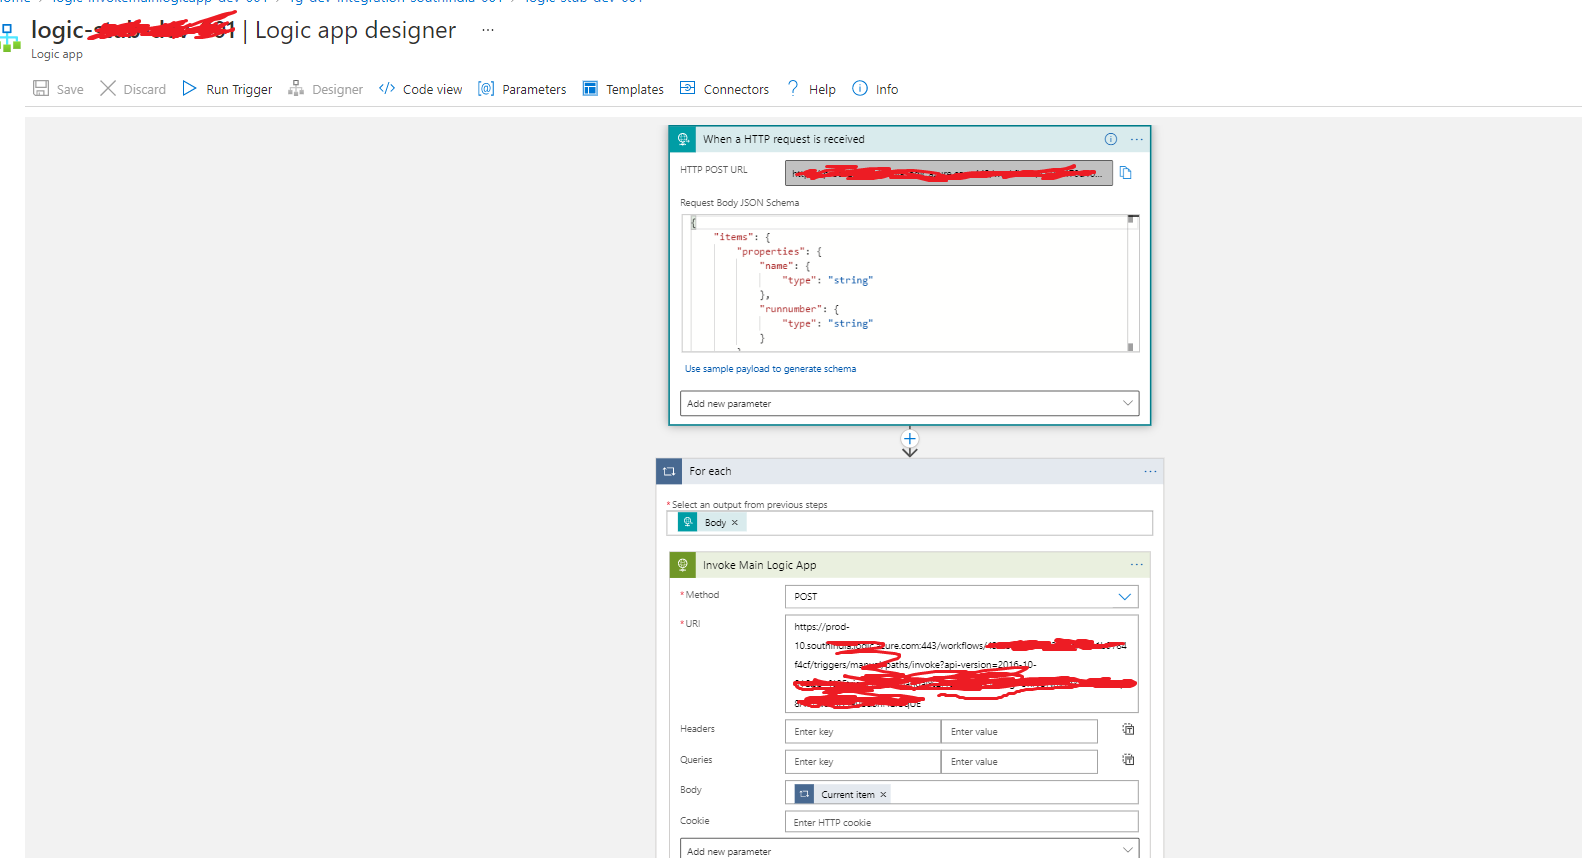
7. There are two ways to call a logic app in another logic app, one way is to use the HTTP Rest connector mentioned in the screenshot and another way is to use the call logic app out of the box connector.
8. Now that we have both the logic apps created, we will make a call to the logic app created in step 6.
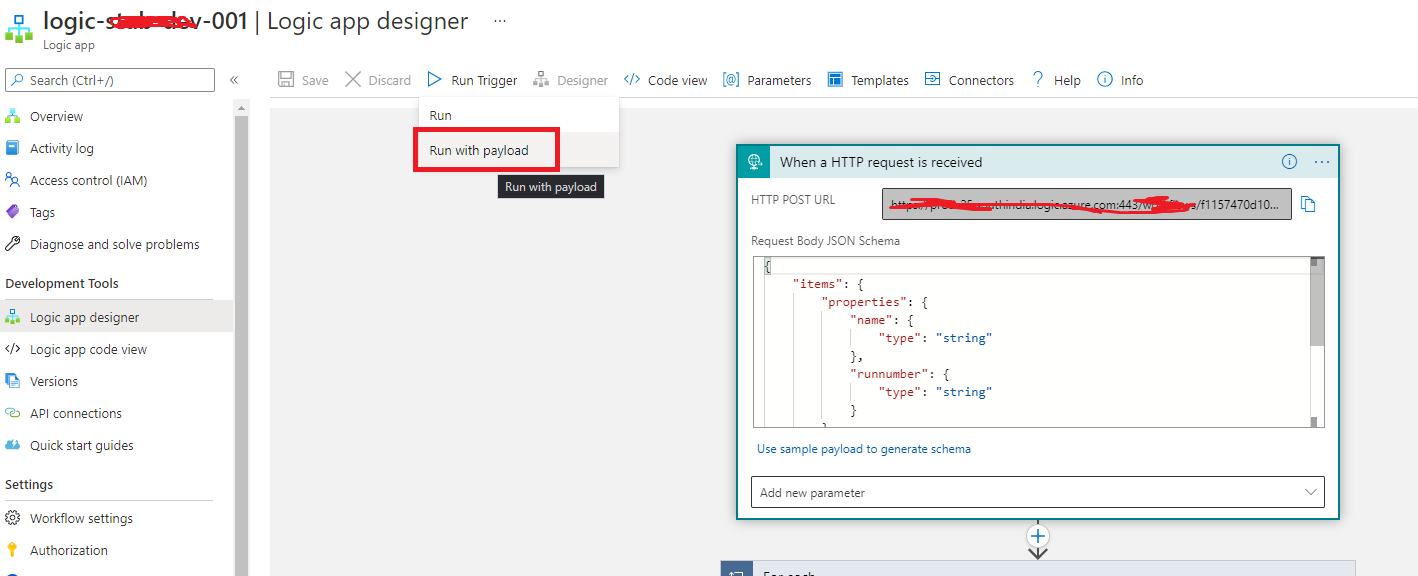
9. There are two options to make a call to this logic app, one option is used to copy the logic app URL from the "When an HTTP Request is Received " Logic App trigger and then use Postman to trigger the logic app and the other one is a recent feature provided within the run trigger button in logic app designer i.e Run with Payload where you can test the logic app by sending the payload as request body in the designer like below which in turn instantiates the logic app.

Sample Request Body :
[
   {
      "name":"testapi1",
      "runnumber":"001"
   },
   {
      "name":"testapi2",
      "runnumber":"002"
   },
   {
      "name":"testapi3",
      "runnumber":"003"
   },
   {
      "name":"testapi4",
      "runnumber":"004"
   },
   {
      "name":"testapi5",
      "runnumber":"005"
   },
   {
      "name":"testapi6",
      "runnumber":"006"
   },
   {
      "name":"testapi7",
      "runnumber":"007"
   },
   {
      "name":"testapi8",
      "runnumber":"008"
   },
   {
      "name":"testapi9",
      "runnumber":"009"
   },
   {
      "name":"testapi10",
      "runnumber":"010"
   },
   {
      "name":"testapi11",
      "runnumber":"011"
   },
   {
      "name":"testapi12",
      "runnumber":"012"
   }
]
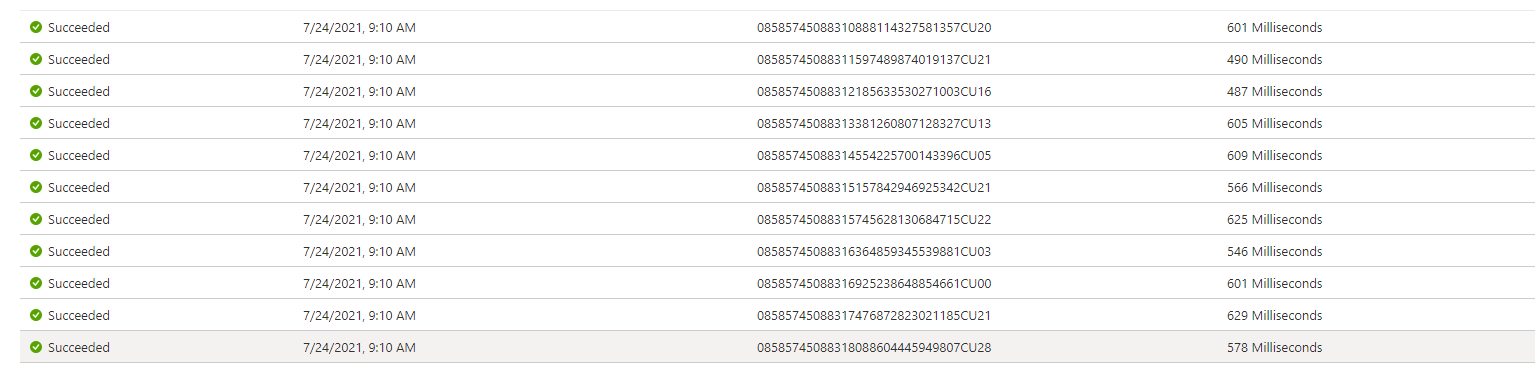
10. Action performed in Step 9 will lead to the trigger of multiple instances of the main logic app parallel and each instance will hit the target API.
Main Logic App :
Parallel Run Instances of the Main Logic App :
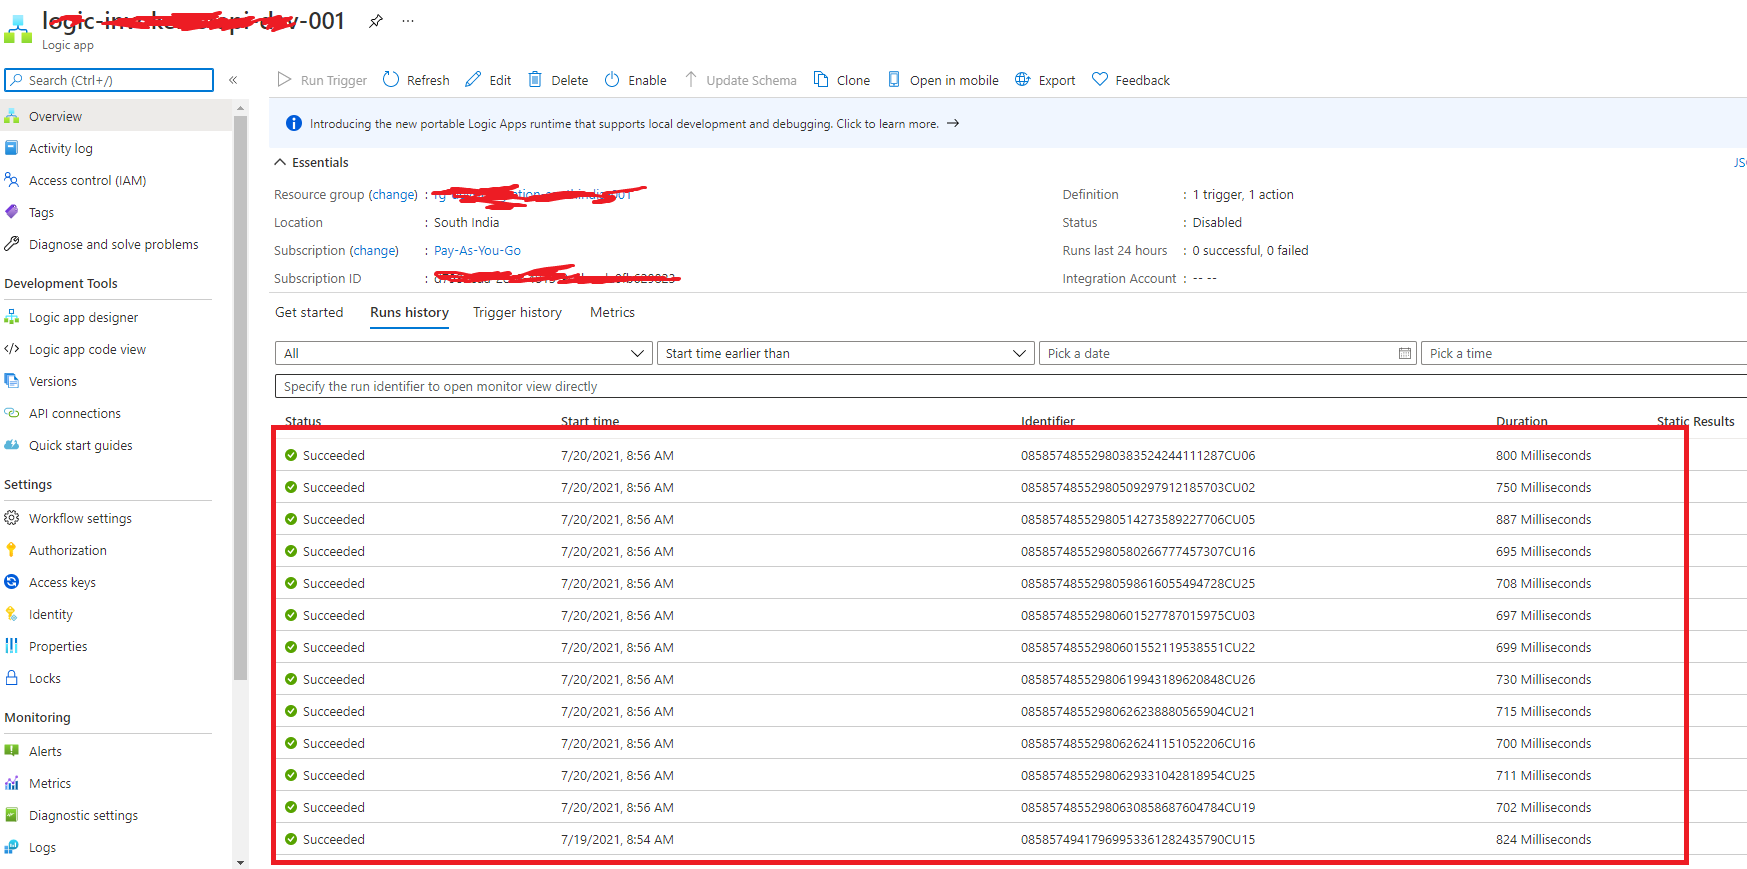
Screenshot of a logic app instance with target API response :

11. Now let's introduce a messaging queue layer between the Source and the Target so that the target gets decoupled from the source and also reduces the load on the target API whenever there is a huge volume of traffic as the messaging services levels the load.
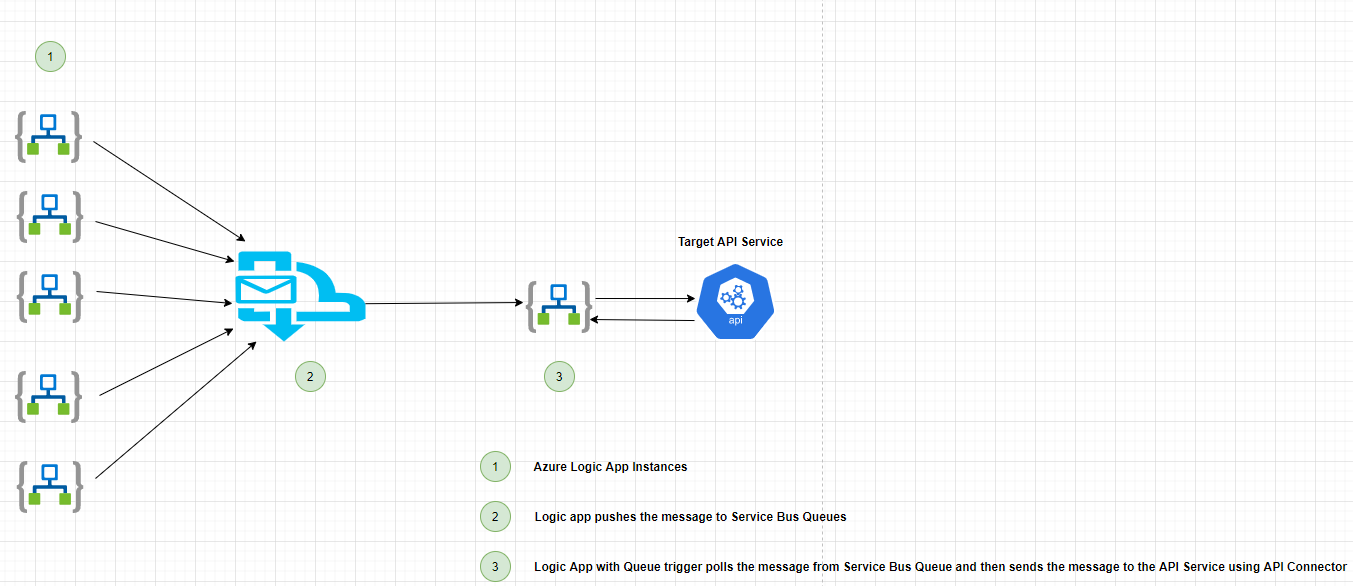
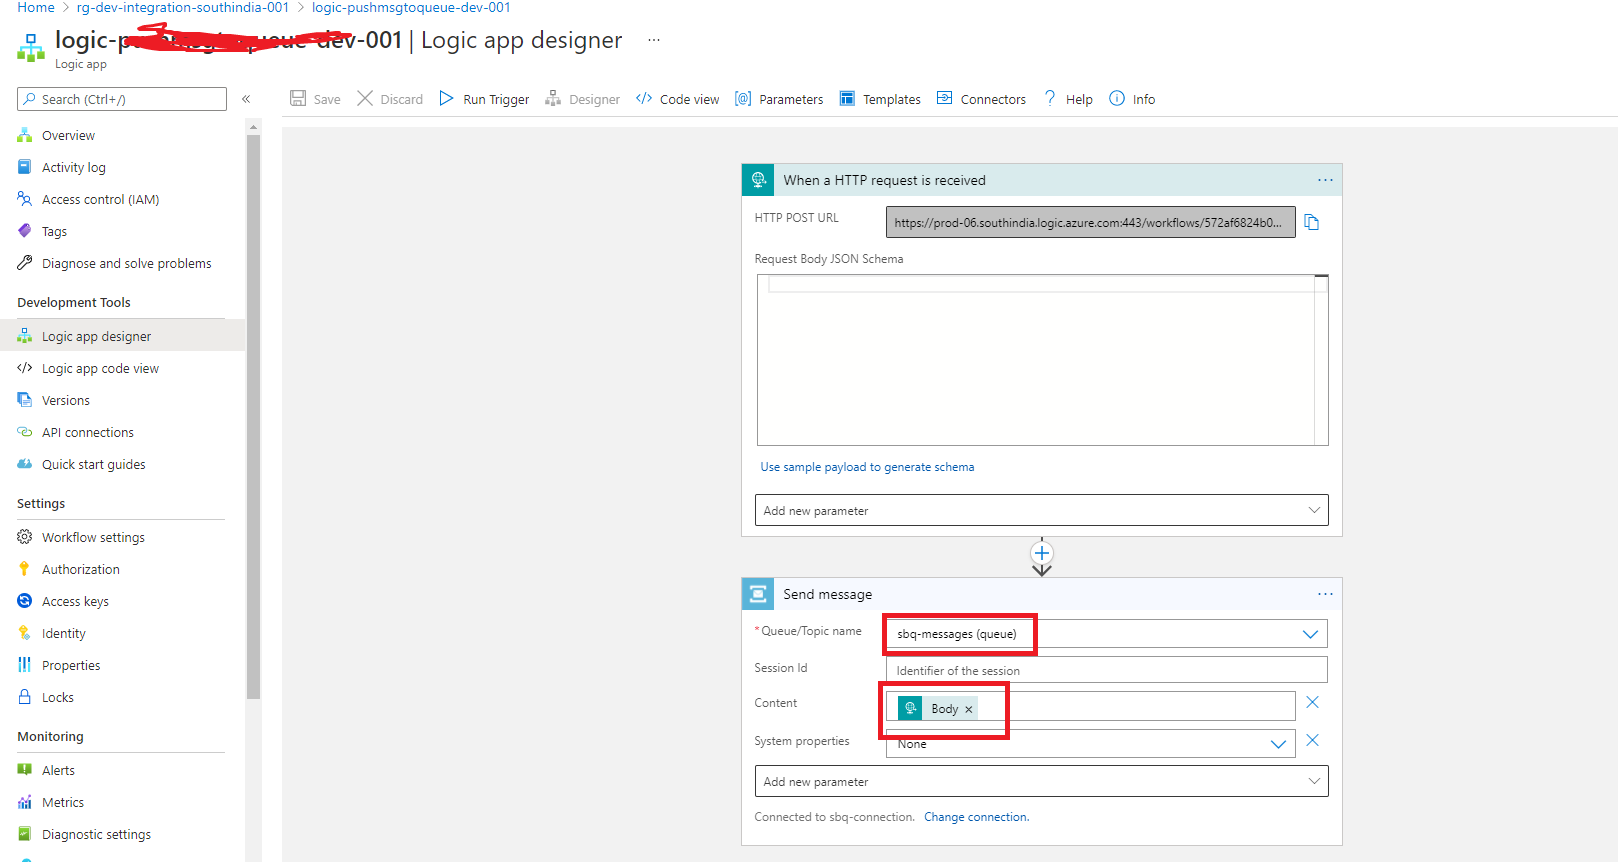
12. To implement this Scenario, in the main logic app instead of hitting the target API directly. we will introduce send message to service bus queue logic app action to first push the messages to Service Bus Queue like mentioned in the screenshot below.
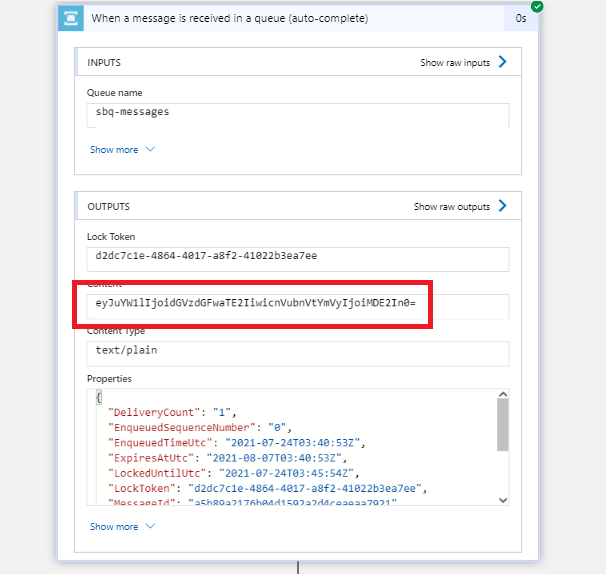
13. This message will be polled by the target logic app using the service bus queue trigger. To keep it simple , I used Service Bus Queue Auto Complete Trigger, however one can use Service Bus Peek Lock Trigger too so that message gets locked until the whole operation is finished and then you can use the complete message in a queue action in the end.
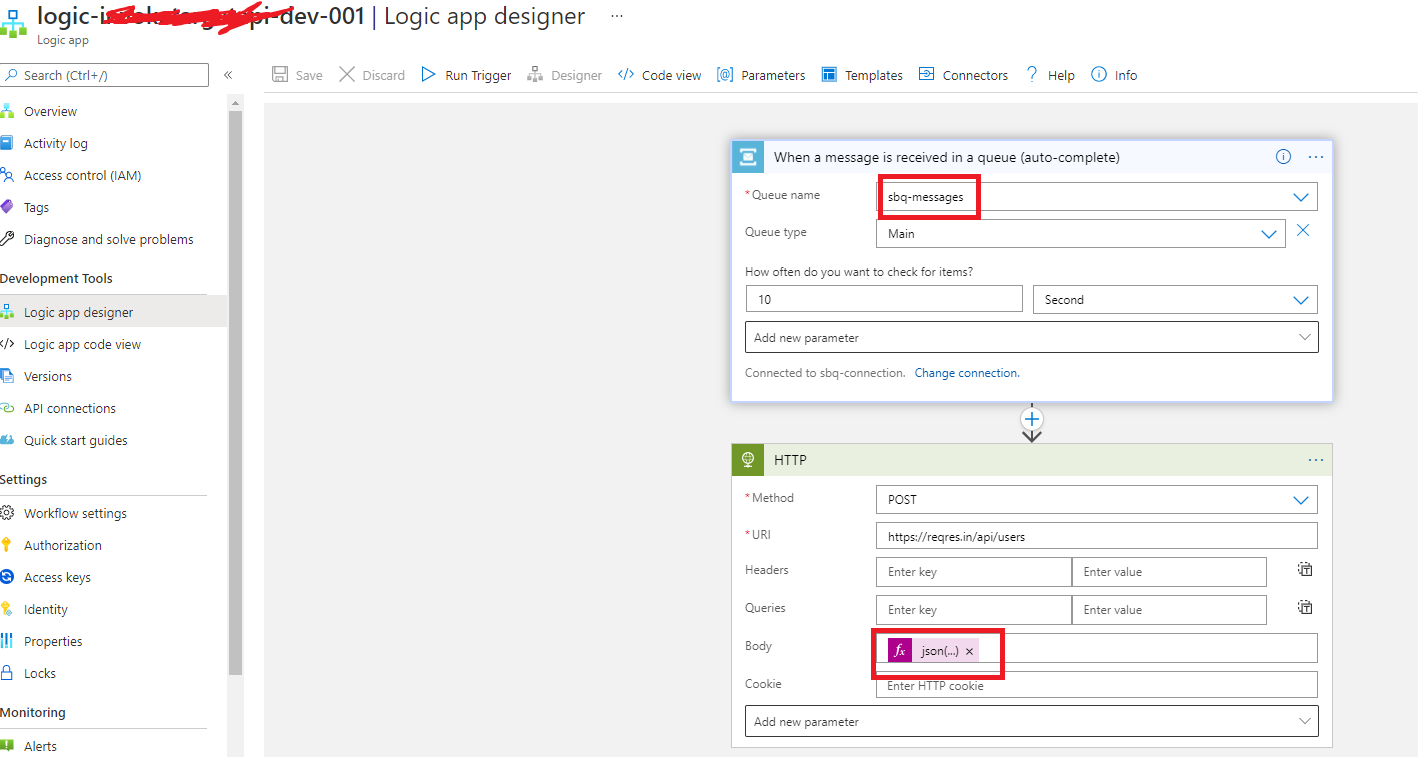
14. Output of Queue Trigger will be a base 64 encoded message, so the below code snippet is used to convert the base64encoded to original JSON object while passing it as a request to target API.
json(base64ToString(triggerBody()?['ContentData']))
Parallel Run Instances of the Target Logic app :
15. So Adding Messaging layer between the source and target immediately improves the solution by decoupling the target from the source and also now the load can be handled using messaging queue by using the polling interval property and at the same time we gracefully handle the messages while the target API is down by disabling the target logic app as the message remains on the queue so that we can push the messages to the API once it is up and running by enabling the logic app back so it starts polling the messages again thereby helping the solution to become more robust.
16. API Reference: https://reqres.in/
Conclusion :
With this, Practical implementation of a Queue Based Load Leveling Pattern in Microsoft Azure is demonstrated using one of the approaches successfully. However, we can implement the same concept using a combination of Azure Logic App and Azure Functions and also using only Azure Functions too. I have discussed the same in the Part 1 blog for which the link is mentioned in the prerequisites step.